To create a new Newsletter just right click the newsletter icon in the tree and click "Create", or if you have existing letters, right click them and choose "Create new from this" to use the old newsletter as a template.
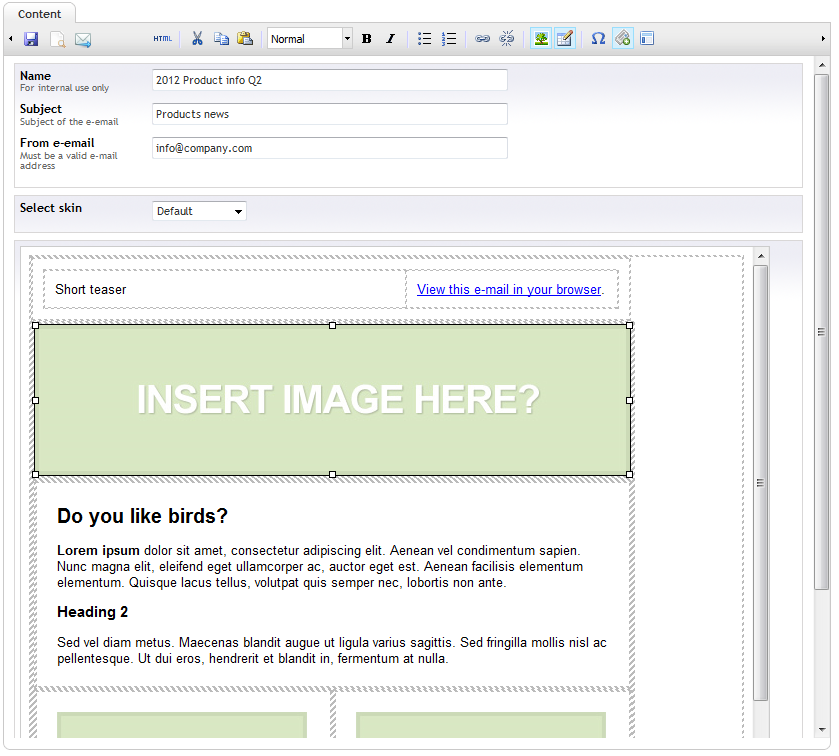
Newsletter Studio uses the same rich text editor as the rest of Umbraco which means that you are already familiar with the editor. You can access all your media items and all your content-nodes as if you where editing content on your site.
Because the editor is just a regular Umbraco Data Type you can access it in the developer-section and choose which plug-ins to show/hide. Default name of the data type is "Rich text Editor Newsletter Studio".
In the toolbar menu you'll find a lot of useful features. Templates is one of them. Clicking this button will show you a dialog with pre defined templates that you can choose to start from.
These template list can be extended by adding new file to the "/umbraco/newsletterstudio/templates"-folder and adding them to the tempates-list found in "/config/tinyMceConfig.config".
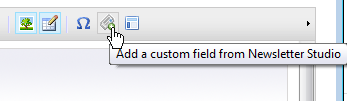 The custom fields are the same as the tags explained in the skins-section on page 5. Basically this means that you can add dynamic content to the newsletter.
These tags will be replaced with the users name, email or other dynamic parts.
This feature is very handy when you want to insert dynamic content into the newsletter. This can be a list of blog posts, news headlines, latest post in the forum or even content from an external source.
Adding a Url content placeholder in the newsletter will render that url into the letter at preview and send out.
To use this with the your own Umbraco site you may need to create newsletter specific templates to render out the nodes that you need to display as this feature will take all HTML that's returned from the source. Ex. you could insert googles start page in the letter by typing google.com in the url-field.
This video shows a demonstration
(This video/feature was added before the "Send out data type" was added. Take a look at the data type before you decide if Insert Url Content is the right solution to your problem)
Newsletter Studio lets you handle lists of subscribers using different mailing lists but it also supports sending newsletters to members in the Umbraco membership-section. Add/remove/edit a subscriber It's easy to add/remove/edit subscribers using the dashboard found by clicking on a subscription in…
When you are done editing the newsletter it's time to send it. Click the "Send e-mail" button in the toolbar. This brings up the "Send newsletter dialog".Here you can choose to: Send out a test - Sends a test to one e-email Send the newsletter now - Sends the letter right away to the selected recei…
If you want to use a content node as the source for your newsletter you can use the custom data type that was introduced in Newsletter Studio version 1.3.2. This can be very useful if you for example stores all newsletters as content on your website. This means that you don't have to copy and paste…
Newsletter Studio doesn't send the message out in the blue. It tracks everything that happens. If it's opened by the receiver, if any links where clicked or if the receiver decided to unsubscribe. You can even see the number of open letters hour per hour during the first week after send out.All news…